
If your brake lights stay on even when you’re not pressing the pedal — or worse, don’t come on at all — the brake light switch could be to blame. This small but crucial component tells your vehicle when you’re braking and activates the brake lights accordingly. A faulty brake light switch can lead not only to safety hazards but also to failed inspections and error codes like P0571.
In this guide, we’ll walk you through everything you need to know about brake light switch problems — from where it’s located to common symptoms, and how to fix or replace it. We’ll also show you how tools like the ANCEL OBD2 scanner can help you quickly diagnose brake light switch-related errors.
What is a Brake Light Switch?
The brake light switch is a small but crucial component in your vehicle’s braking and lighting systems. It activates the brake lights when you press the brake pedal, signaling to drivers behind you that you’re slowing down or stopping. A malfunctioning brake light switch can lead to inconsistent or non-functional brake lights — significantly increasing the risk of rear-end collisions.
Brake lights emit a bright red warning signal that cuts through poor visibility conditions, giving trailing drivers enough time to react and reduce speed. Ensuring your brake light switch functions properly is vital for both road safety and legal compliance.
| Type | Description | Common Usage |
|---|---|---|
| Mechanical Switch | Triggered by the physical movement of the brake pedal | Traditional vehicles |
| Electronic Switch | Uses sensors and electrical circuits to detect braking and send signals | Modern, electronically controlled vehicles |
Where is the Brake Light Switch Located?
The brake light switch is typically mounted near the brake pedal arm, just above where your right foot rests while driving. It’s a small mechanical or electronic component that activates your brake lights when the brake pedal is pressed.

When you apply the brake, the pedal pushes against the switch — triggering an internal spring-loaded or sensor-based mechanism to complete the electrical circuit and illuminate the brake lights.
In many vehicles, the switch is secured in place using a grommet or stopper, which ensures the correct pedal position and pressure for activation. If the grommet falls off or deteriorates, the switch may not engage properly — causing brake lights to stay on or fail to light up at all. Fortunately, brake switch stoppers or grommets are inexpensive and can often be replaced separately without needing a whole new switch.
The switch is wired directly into the vehicle’s brake light circuit and, in modern cars, may also interface with the transmission control unit or cruise control system. If you’re troubleshooting or replacing the switch, consulting a brake light switch wiring diagram specific to your vehicle can help ensure proper reconnection and function.

What Causes a Faulty Brake Light Switch?
1. Normal Wear and Tear
Over time, the internal contacts of a mechanical brake light switch can wear out or corrode. This causes intermittent or complete failure in signaling the brake lights.
2. Misaligned or Broken Brake Pedal Stopper (a.k.a. Bumper)
One of the most overlooked causes is a broken or missing brake pedal stopper — a small rubber or plastic bumper that sits between the brake pedal arm and the switch.
When the stopper cracks, falls off, or deteriorates, the switch no longer gets properly pressed or released.As a result, the brake lights may stay on all the time, or not come on at all, even though the switch itself is still functional.
Real-World Fix from a DIYer on Reddit
“The brake lights in my ‘96 Tercel stopped working... turns out the plastic stopper had broken. I glued two nickels together and jammed them into the hole where the plastic was—fixed it for 10¢!”
This kind of quick fix works in a pinch, but replacing the stopper with a proper bumper or grommet is always safer for long-term reliability.
3. Electrical Wiring Issues
Faulty wiring, loose connectors, or damaged terminals in the switch harness can prevent signals from reaching the brake lights. This may also trigger warning lights on the dash or store fault codes in the ECU.
4. Faulty Installation or Adjustment
If the switch was recently replaced or adjusted (e.g., after brake service), incorrect positioning can lead to poor contact or constant engagement.
5. Moisture or Dirt Contamination
For vehicles that operate in harsh environments, water intrusion or dirt build-up can affect switch movement or internal contact integrity.
6. Failed Electronic Sensor (for Modern Vehicles)
In newer cars with electronic brake systems, the brake switch may be part of a sensor network that interacts with the ABS, ESC, or cruise control. Electronic failure may not be visible externally and requires an OBD2 scanner like the ANCEL FX2000 to diagnose.
Bad Brake Light Switch Symptoms
1. Brake Lights Stay On Constantly
One of the clearest signs is that the brake lights remain on even when the pedal isn’t being pressed. This usually means the switch is stuck in the “closed” position or the stopper (bumper) is broken or missing.A faulty stopper is a common cause — without it, the switch doesn’t release when the pedal returns.
2.Brake Lights Don’t Turn On
If pressing the brake pedal doesn’t activate the brake lights, the switch might be stuck open, disconnected, or electrically failed. This creates a major safety hazard, especially at night or in traffic.
3.Cruise Control Not Working or Disengaging
Modern vehicles often use the brake light switch to disengage cruise control. If the switch is faulty, cruise control may not engage, or it may cut out unexpectedly.
4.Gear Shift Locked (in Automatic Vehicles)
In some automatic cars, the brake light switch also communicates with the shift interlock system. If the switch fails, you might not be able to shift out of “Park” because the car doesn’t detect that the brake pedal is being pressed.
5. Warning Lights or DTC Codes
Some vehicles may trigger dashboard lights like:
Check Engine Light (CEL)
ABS or Traction Control Warning
Stored codes like P0571 – Brake Switch A Circuit Malfunction
These codes can be retrieved and diagnosed using an ANCEL OBD2 scanner
6. Battery Drain
If your brake lights stay on due to a faulty switch, they may stay illuminated even when the car is off — leading to overnight battery drain.
Related Reading: What Does DTC Mean In A Car Scanner | ANCEL
How to Diagnose a Bad Brake Light Switch (With and Without a Scanner)
If you suspect a faulty brake light switch, the most reliable and efficient way to diagnose the problem is by using an OBD2 scanner. This is especially important for modern vehicles, where the brake light switch is often integrated with critical systems like ABS, ESC, and cruise control. A bad switch might not be obvious, but will typically trigger a diagnostic trouble code (DTC) that can be read with the right tool.
OBD2 Scanner Diagnosis (Recommended for Modern Cars)
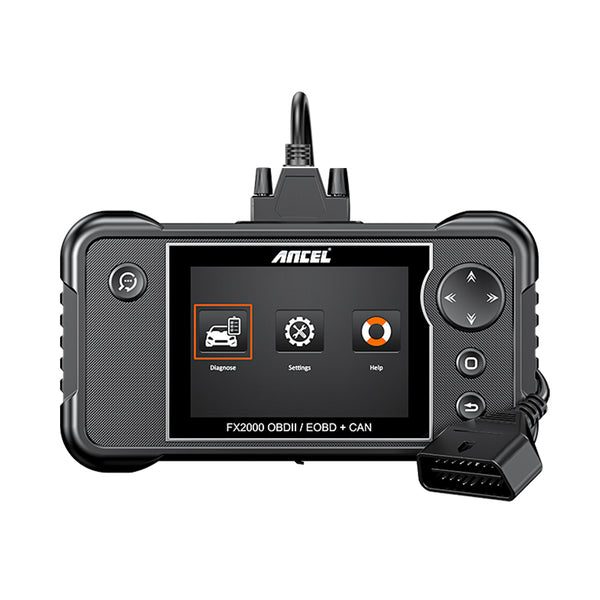
Using an OBD2 scanner like the ANCEL FX2000:
- Plug the OBD2 scanner into your vehicle’s diagnostic port.
- Turn the ignition to the ON position (engine off).
- Navigate to Live Data → Check Brake Pedal Status.
- When you press the brake pedal, the status should change from OFF to ON.
- Go to Read Trouble Codes (DTCs) and look for common codes such as:
P0571 – Brake Switch "A" Circuit Malfunction
C0044 – Brake Pedal Position Sensor Circuit Error
U0121 – Lost Communication with ABS Module
Diagnosing Without a Scanner
If You Don’t Have a Scanner, there are some useful ways:
1. Visual Inspection
- Locate the brake light switch near the top of the brake pedal arm. Check alignment: Is the switch properly positioned against the brake pedal?
- Inspect the brake pedal stopper or bumper (a small rubber or plastic piece). A missing or damaged stopper can prevent the switch from disengaging.
- Wiggle the wire harness and check for loose or disconnected plugs.
2. Brake Light Function Test (with a mirror or friend)
With the ignition ON and engine OFF:Press the brake pedal and check the rear brake lights. Release the pedal and observe the light behavior.
What to look for:
- Always ON → Switch may be stuck or the stopper is missing.
- No lights → Circuit may be open or the switch is broken.
- Flickering lights → Poor connection or intermittent contact inside the switch.
3. Multimeter Continuity Test
- Disconnect the brake light switch.
- Set your multimeter to continuity mode.
- Press and release the brake pedal.
- You should see the signal change from “OFF” to “ON” when pressing the pedal and back when released.
If there is no change or delayed response, the switch or its internal sensor may be faulty.
How to Fix or Replace a Brake Light Switch
If your brake lights are staying on, not turning on at all, or you’ve confirmed a faulty brake light switch through diagnostics, replacing or fixing it is a relatively simple task that you can often do yourself. Here’s how:
Step-by-Step Replacement Process
1. Disconnect the Battery
For safety, always disconnect the negative terminal of the battery to avoid electrical shorts.
2. Locate the Brake Light Switch
It’s usually mounted above the brake pedal arm, near the top.
3. Disconnect the Wiring Connector
Gently unplug the electrical connector from the switch. Check for corrosion or broken pins while you're at it.
4. Remove the Faulty Switch
The switch is often held in place by a locking nut, twist-lock, or clip system. Unscrew or unclip it.
5. Inspect the Stopper or Grommet
If the rubber stopper, grommet, or bumper on the brake pedal arm is missing or damaged, replace it. A missing stopper can make the switch stay “pressed” all the time, keeping the lights on even when you're not braking.
6. Install the New Brake Light Switch
Position it properly so that it aligns with the brake pedal arm. Thread or clip it in place securely.
7. Reconnect the Electrical Connector
Make sure the connector clicks into place and isn’t loose.
8. Reconnect the Battery
Restore power to the vehicle once installation is complete.
Calibration & Final Testing
After installation, you’ll want to confirm the brake light switch is functioning correctly:
Manual Brake Light Test:
Turn the ignition to the ON position. Press and release the brake pedal while checking the rear brake lights (ask a friend or use a mirror). The lights should:
- Illuminate when the pedal is pressed
- Turn off completely when the pedal is released
OBD2 Scanner Check (Optional but Recommended):
For modern vehicles, connect a scan tool like the ANCEL FX2000 to:
- Confirm the brake pedal status switches between ON and OFF in live data
- Clear any stored DTC codes related to brake switch failure (e.g., P0571)
Note: If the brake lights remain on after replacing the switch, double-check the stopper and alignment. A missing rubber pad is a very common culprit, especially in Honda and Toyota vehicles.
How Much Does It Cost to Replace a Brake Light Switch?
Compared to other car repairs, replacing a brake light switch is relatively inexpensive. According to several professional technicians and vehicle owners, the cost of an OEM replacement typically ranges from $30 to $50, and the entire replacement process usually takes only 10 to 15 minutes—especially on models like the Mitsubishi Lancer ES. While some auto shops may quote a few hundred dollars for parts, diagnostics, and labor, this repair can often be done easily at home with basic tools.
If you're comfortable using basic tools, replacing a brake light switch is one of the easiest DIY car repairs—potentially saving you hundreds of dollars. Always ask for a clear diagnosis before authorizing costly repairs, especially when a small component like a brake pedal switch could be triggering related issues like limp mode or brake light malfunctions.
Maintenance Tips to Avoid Brake Switch Failure
1. Regularly Inspect the Brake Pedal Assembly
Check the area around the brake pedal for signs of wear or misalignment. A dislodged stopper, broken bumper, or damaged grommet can prevent the switch from functioning properly.
2. Keep Electrical Connectors Clean and Secure
Corrosion or loose connectors can interrupt the signal from the switch. Periodically inspect the wiring harness and plug for dirt, moisture, or signs of fraying.
3. Avoid Excessive Force on the Pedal
Slamming the brake pedal repeatedly may stress or dislodge the brake light switch. Drive gently and use consistent braking habits to protect internal components.
4. Watch for Early Warning Signs
If your brake lights stay on, don’t illuminate, or flicker, address the issue immediately. These are often early symptoms of a failing switch or related hardware.
5. Use an OBD2 Scanner for Routine Checks
Tools like the ANCEL FX2000 can help you monitor live brake pedal status and detect fault codes like P0571 or C0044 before they lead to bigger problems.
Can ANCEL Scanner Detect Brake Light Switch Problems?
Yes, ANCEL scanners can help detect brake light switch issues, especially models with real-time data and full-system diagnostics like the ANCEL FX2000.
What ANCEL FX2000 Can Do:
The ANCEL FX2000 excels at diagnosing P0571 issues with features like:
- Read Diagnostic Trouble Codes (DTCs), such as P0571,C0044,U0121
- Monitor Brake Pedal Status in Real Time
- Check Related Systems, Detect secondary symptoms caused by switch failures
- DIY-Friendly Interface


